Hosting · HarborPilot
Uploading with Cloudflare or FTP
You can always drag three files to your host after each release. If you'd rather not, HarborPilot can upload them for you, to Cloudflare R2 or to an FTP server, and then check they're live. This guide sets up both, using Tidemark and updates.fracturedbits.com.
By Francisco Cantu ·
Which to choose
- Cloudflare R2 if your domain is on Cloudflare or can move there. HarborPilot sets up the storage, your address, and an upload key from inside the app, and R2 has no download fees. The address has to be on a domain you own; Cloudflare's development addresses aren't for shipped apps.
- FTP or FTPS if your website already lives on a web host that gives you an FTP account.
- By hand for anything else. Nothing to set up; see step 8 of the getting-started guide.
An app uploads to one host. Choosing one in App Settings replaces the other.
Cloudflare: Set Up on Cloudflare…
Click Set Up on Cloudflare… next to “Where will you upload updates?” when you connect an app. Before an app's first release, it's also next to the upload folder in App Settings → Updates. After the first release the address is locked, so choose Cloudflare in App Settings → Upload and enter the bucket and key yourself.
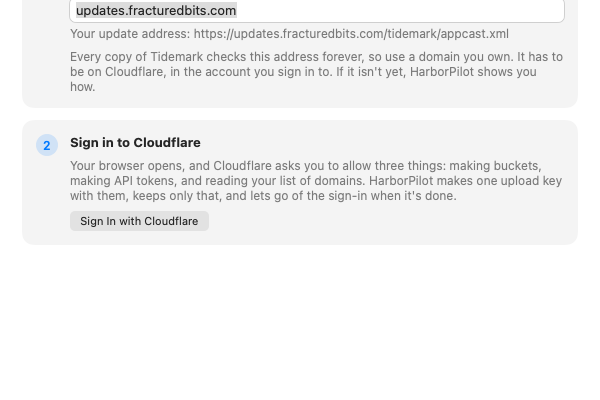
- Choose your address, such as
updates.fracturedbits.com. Every copy of your app checks it forever, so use a domain you own. It has to be on Cloudflare, in the account you sign in to. - Sign in to Cloudflare. Your browser opens and Cloudflare asks you to allow three things: making buckets, making API tokens, and reading your list of domains. If you're in more than one Cloudflare account, choose the one that holds your domain.
- HarborPilot sets up the rest: it makes the bucket, attaches your address, waits for it to answer, and makes an upload key for that bucket only.
Click Use This Address when it's done. From App Settings, click Save to keep it. Your Keychain keeps the upload key; HarborPilot keeps nothing else and lets go of your Cloudflare sign-in. If you close the guide without using the address, HarborPilot deletes the key from Cloudflare.
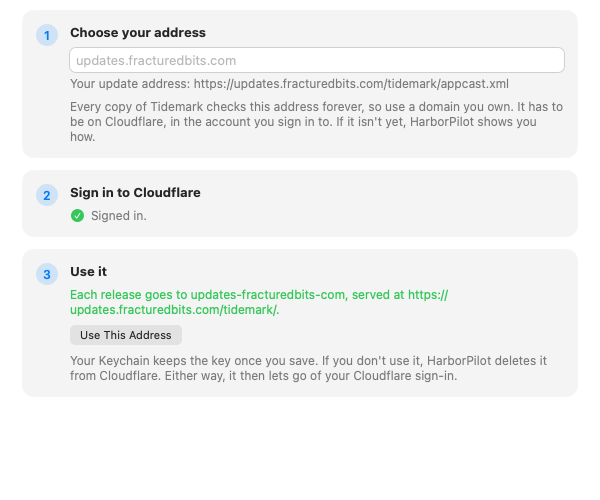
The bucket is named after your address, updates-fracturedbits-com here, and each app gets its own folder in it, so a second app on the same domain shares the bucket.
If Cloudflare needs something first
- Add your domain to Cloudflare: the domain isn't in the account you signed in to. Add it on Cloudflare's Free plan, keep your existing DNS records, then click Check Again.
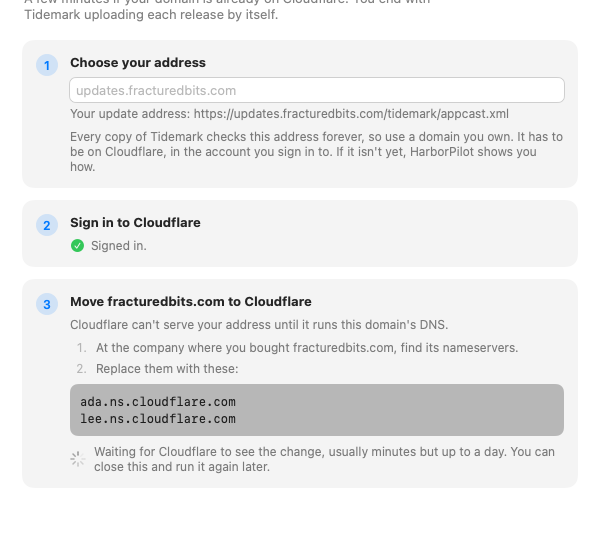
- Move your domain to Cloudflare: Cloudflare needs to run the domain's DNS. Replace the nameservers at the company you bought it from with the two Cloudflare shows. It usually takes minutes but can take a day; you can close the guide and run it again later.
- Turn on R2: the account hasn't used R2 yet. Turn it on in the dashboard (it may ask for a payment method, even on the free tier), then click Check Again.
- Your sign-in has expired: a sign-in lasts an hour. Click Sign In Again; nothing is lost.
- The address isn't answering yet: a new address's certificate can take a while. HarborPilot checks again after your first release.
If sign-in fails in the browser, try again with your Mac's default browser. Prefer to make the bucket and key yourself? Turn on Use a Key in the guide and paste an R2 API token with Object Read & Write on that bucket only.
FTP: App Settings → Upload
Open App Settings → Upload, choose FTP, and fill in:
- Server, such as
ftp.fracturedbits.com. Add:portonly if it isn't 21. - Security: FTPS unless your host doesn't offer it. Plain FTP sends your password unencrypted.
- User and Password. The password is kept in your Keychain.
- Archive folder: the folder on the server that serves your update address, such as
public_html/updates/tidemark. Leave Latest folder and Feed folder empty when everything goes in one folder.
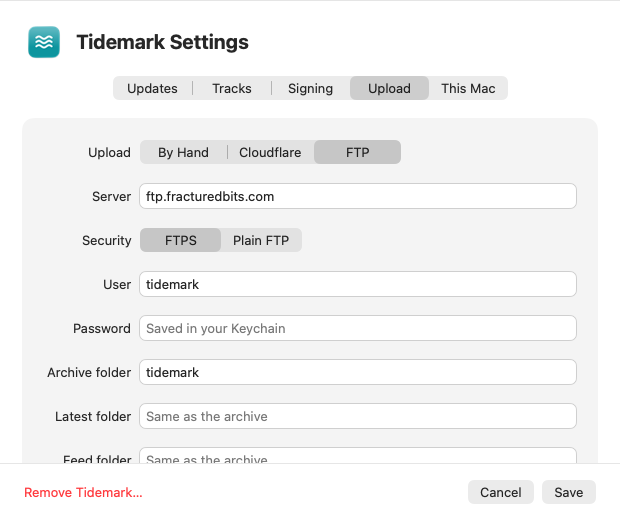
Click Check Connection. HarborPilot signs in and lists each folder without changing anything, then click Save. SFTP and implicit TLS on port 990 aren't supported yet; most hosts offer FTPS on port 21 beside them.
Each file goes up under a temporary name and then takes its place, so nobody downloads half a file. FTP can't set caching headers, so make sure your web server doesn't cache appcast.xml for long.
Uploading automatically
With either host, After a release: Upload automatically, then check it's live is on. When Apple's check finishes, HarborPilot uploads the archive, then the -latest file, then appcast.xml, and runs the live check. You'll get a notification when it's live. Turn it off to upload with the Upload to Cloudflare or Upload to server button on the Upload screen instead.
When an upload fails
- Couldn't reach Cloudflare or your server: check your connection and click Try Again. Files that went up stay there; the rest go up next time. Some networks block Cloudflare's storage addresses; if other sites work, try another network.
- The archive is already there, and it's a different file: HarborPilot never replaces a release's archive, since people may be downloading it. Cancel the release and make a new one, or remove the old file yourself.
- The server refused the user name and password: check them in App Settings; your host's control panel lists its FTP accounts.
- The server didn't offer FTPS: HarborPilot didn't send your password. Ask your host to turn on FTPS.
For problems the live check finds after an upload, see when the live check fails.

Simplify your next release with HarborPilot.
Set it up once and every release after that uploads itself. Your files stay on your own host, under your own domain, with keys only in your Keychain.
Sources and further reading
- Cloudflare R2: Public buckets and custom domains
- Cloudflare: Change your nameservers
- Cloudflare R2 pricing
Service limits and Apple requirements can change. Check the linked documentation before publishing. HarborPilot is not affiliated with Apple, Cloudflare, or the Sparkle project.